← Previous Post
Introduction to Java Programming
Next Post →
File Handling in Java
In Java,Graphical user interface is the collection of visual components that enable intuitive and user-friendly user interaction with a program. Users can interact with graphical elements such as buttons, text fields, checkboxes, and menus rather than text-based commands.
A Component is an individual graphical element that can be displayed on the screen and used to interact with the user. Components serve as the core elements of a graphical user interface and include items such as:
In Abstract Window Toolkit (AWT), all these components inherit from the base class: java.awt.Component
Container: is a special type of component designed to hold and organize other components. Acting as a parent, it manages the placement and grouping of its child components.The following are Key Features of a Container
BorderLayout, FlowLayout, or GridLayout.Panel, Frame, Window, and Dialog are common Java container types. A Panel is a simple container that is perfect for grouping and organizing similar components because it may be integrated into other containers. Usually used as the primary window of a desktop application, a Frame is a top-level window with borders and a title bar. Another kind of top-level container is a window, which is different from a frame in that it doesn't have a menu bar or other typical window decorations. Finally, a dialog is a pop-up window that is frequently used for brief interactions, such presenting messages or asking the user for input.
Abstract Window Toolkit: One of the first graphical user interface (GUI) libraries was the Abstract Window Toolkit (AWT), which Sun Microsystems included in Java's core libraries in 1995. Because it is a platform-dependent API, GUI elements are rendered by the windowing system of the underlying native operating system. This may lead to minor variations in behavior and appearance between systems.AWT offers a basic collection of GUI components that form the foundation for building graphical applications.Some AWT components are
All of these elements are part of the java.awt package and act as the essential tools for constructing simple GUI programs. However, because AWT components rely on the native graphical resources of the operating system, they can lack consistency and offer limited flexibility when running across different platforms.
Swing: is an advanced GUI toolkit built on top of AWT, but it is a platform-independent. It offers more powerful and flexible components such as JFrame, JLabel, JButton, and more located in the javax.swing package.Swing supports a rich set of features and is widely used for desktop applications.
Apart from the fundamental elements, Swing facilitates sophisticated features like pluggable look-and-feel, which allow programs to dynamically modify their visual appearance without compromising functionality. Additionally, it supports a variety of layout managers to effectively arrange components, double buffering for fluid graphics, and rich event handling. Because of these potent features, Swing is frequently used to create complex, responsive desktop apps that offer a flawless user experience.
An event is a change in the state of a component, triggered by user interaction such as clicking a button, typing on the keyboard, or selecting an item from a list.
Event Handling is the process of responding to these events. Java uses the Delegation Event Model to handle events in a structured way. This model includes:
ActionEvent object.
This event object contains essential information such as the source of the event, the time it occurred, and other context-specific data.

Source Code
package loginForm;
import java.awt.event.ActionEvent;
import java.awt.event.ActionListener;
import javax.swing.JButton;
import javax.swing.JFrame;
import javax.swing.JLabel;
import javax.swing.JPasswordField;
import javax.swing.JTextField;

public class LoginForm extends JFrame
{
    private JLabel username;  // Labels
    private JLabel password;
    private JTextField txtusername; // Attribute declaration
    private JPasswordField txtpassword;
    private JButton login;

    public LoginForm()     // Constructor
	{
        setTitle("Login");  // Title
        username = new JLabel("User Name:");
        password = new JLabel("Password:");
        txtusername = new JTextField();
        txtpassword = new JPasswordField();
        login = new JButton("Login");

        setLayout(null); // Custom layout

        username.setBounds(10, 10, 200, 30);
        txtusername.setBounds(100, 10, 200, 30);
        password.setBounds(10, 50, 200, 30);
        txtpassword.setBounds(100, 50, 200, 30);
        login.setBounds(30, 100, 100, 30);

        add(username);
        add(password);
        add(txtusername);
        add(txtpassword);
        add(login);

        setSize(400, 200);
        setLocation(400, 150);
        setDefaultCloseOperation(JFrame.EXIT_ON_CLOSE);
        setVisible(true);

        ActionListener lis = new ActionListener() {
            @Override
            public void actionPerformed(ActionEvent e) {
                System.out.println("Button Clicked!!");
            }
        };
        login.addActionListener(lis);
    }

    public static void main(String[] args) {
        LoginForm obj = new LoginForm();
    }
}
Java Database Connectivity Java Database Connectivity (JDBC) is a specification that defines a standard Application Programming Interface(API) for Java applications to interact with database management systems. It enables developers to write Java applications that can:
The JDBC API comprises a collection of interfaces and classes in the Java language. Since JDBC is platform-independent, a single JDBC-based Java program can communicate with any DBMS that provides a compatible driver.We can set up JDBC in your Java IDE using the following steps:
In general,the following classes are esential during JDBC to java connectivity
In Java, the JTable class from the Swing framework is frequently used to generate tables. There are two main methods for making a table:
Directly by passing the data and column names as arrays to the JTable constructor, you can create a table using the following steps
Example
JTable table = new JTable(rows, columns);
table.setPreferredScrollableViewportSize(new Dimension(400, 300));
table.setFillsViewportHeight(true);
JScrollPane pane = new JScrollPane(table);
add(pane);
a more adaptable method of managing table data is offered by the DefaultTableModel. Once the table has been built, it enables you to dynamically add, remove, or alter rows.
Example
DefaultTableModel model = new DefaultTableModel(rows, columns);
JTable table = new JTable(model);
table.setFillsViewportHeight(true);
JScrollPane pane = new JScrollPane(table);
add(pane);

Online Communication Platform for Teachers and Students.

What Our Users Say.
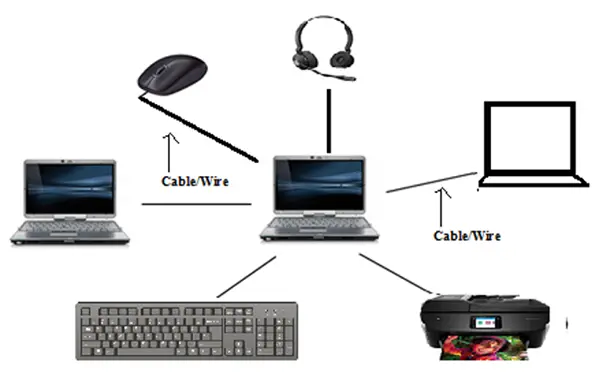
Introduction to Computer Networking.

I’m committed to providing tailored solutions and always ready to assist if any issue arises.