
How to Configure a Client-Server Network
What is Client Server Network?
In a Client-Server network configuration, a central computer known as the server provides resources, data, services, or programs to other computers called clients within a Local Area Network. This setup follows a distributed application architecture where workloads are divided between servers and clients.
In client server configuration, clients send requests to the server, which processes the data and returns the required information. Clients typically do not share resources with each other but depend on the server for access to the required services or data.
Common examples of client-server models include email systems and the World Wide Web, where email clients interact with mail servers, and web browsers such as Google Chrome, Mozilla Firefox, or Safari request web content from servers.
A Client refers to a device or application such as a computer, smartphone, or browser) that initiates communication and requests services or data from a server.
A Server is a remote system that handles these requests, processes them, and returns the results.
Before we configure client server network:
- A computer running a Windows operating system (excluding Windows Home Edition)
- A server operating system such as, Windows Server 2012)
- A crossover UTP cable
Windows Server 2016 Domain Setup: Step-by-Step Guide
- Prepare the Environment
- Server Computer:
Server1with Windows Server 2016 installed - Client Computer:
Clientrunning Windows 10 Professional or Enterprise - Networking: Use either a straight-through or crossover Ethernet cable to connect devices
- Install Windows Server 2016 on the server machine
- Server Computer:
- Install Active Directory Domain Services (AD DS)
- Assign a static IP address to the server
- Set the DNS server to
127.0.0.1(loopback address)
To install and configure AD DS:
- Open Server Manager and select Active Directory Domain Services
- Once installed, click Promote this server to a domain controller
- Choose “Add a new forest” and set the root domain name →
mylab.local) - Provide a DSRM password for Active Directory recovery
- Click Next through the options:
- NetBIOS domain name will auto-populate
- Confirm locations for AD database, log files, and SYSVOL folder
- Review configuration, proceed to the prerequisite check
- If the prerequisite check fails:
- Open Command Prompt as Administrator
- Run:
net user administrator *and enter a new password - Then run:
net user administrator /passwordreq:yes - Re-run the prerequisite check
- If successful, click Install. The server will reboot automatically.
- Configure the Client Computer
- Temporarily disable the firewall on the client
- Assign a static IP addresslike,
192.168.100.6if the server uses.5) - Right-click This PC → Properties → Change settings
- Click Network ID → Next through the prompts
- Enter:
- Domain username and password
- Domain name like,
mylab.local)
- Provide computer name and server name
- Complete setup and restart if required
- Install Additional Windows Server 2016 Services
After setting up AD DS, we can the following services:
- DNS Server: Resolves domain names to IP addresses
- DHCP Server: Automatically assigns IP addresses to client machines
- FTP Server: Enables file transfer protocol services for web publishing
- Mail Server: Use
hMailServerandMozilla Thunderbirdfor email functionality - Web Server (IIS): Host and manage scalable web applications
- Remote Desktop Services: Allows remote administration and user sessions
- Active Directory Users and Computers: Create Organizational Units (OUs), Groups, and Users
Latest Posts
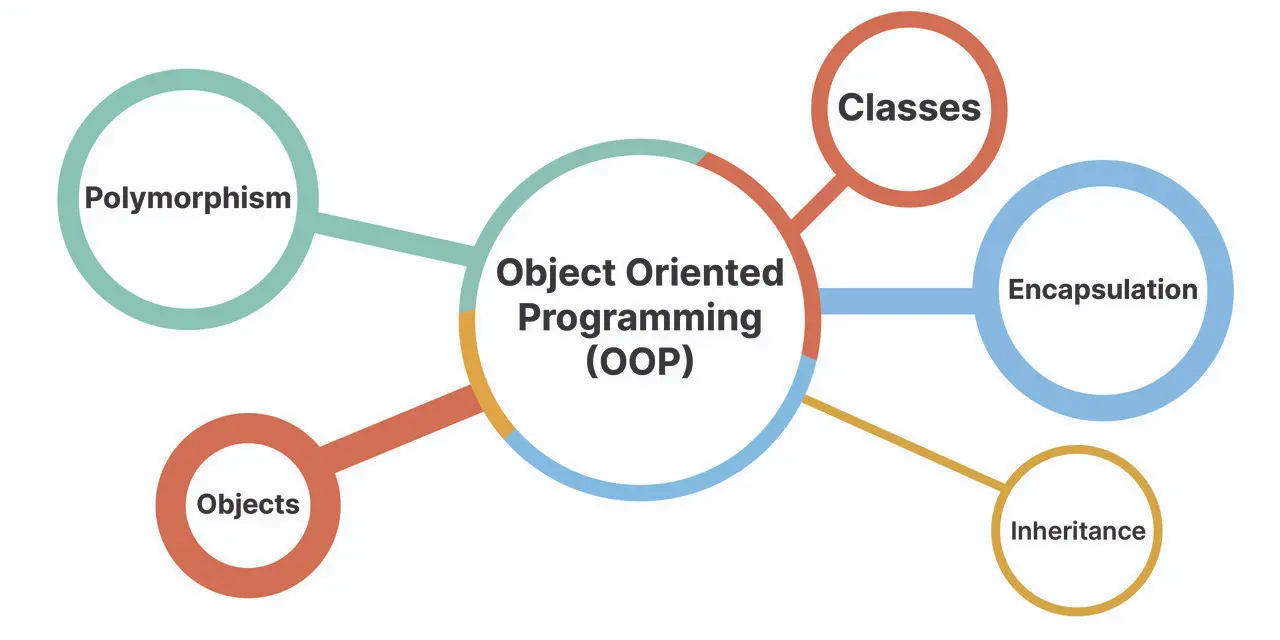
Object Oriented Programming in C++ for Beginners.
LetUsLearn
May 28, 2025
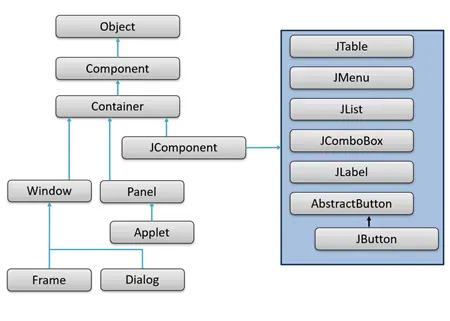
Getting Started with Java GUI
LetUsLearn
May 28, 2025
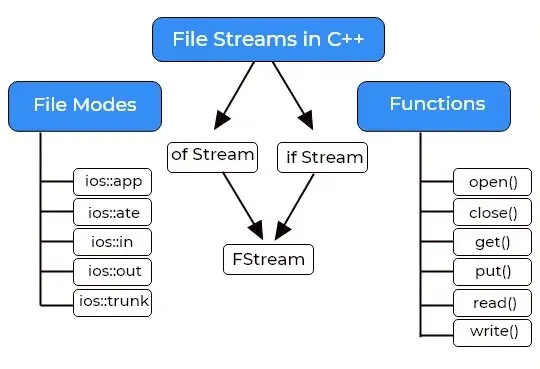
File Handling in C++
LetUsLearn
June 10, 2025

I’m committed to providing tailored solutions and always ready to assist if any issue arises.
LetUsLearn