How to Configure a Client-Server Network
In a Client-Server network configuration, a central computer known as the server provides resources, data, services, or programs to other computers called clients within a Local Area Network. This setup follows a distributed application architecture where workloads are divided between servers and clients.
In client server configuration, clients send requests to the server, which processes the data and returns the required information. Clients typically do not share resources with each other but depend on the server for access to the required services or data.
Common examples of client-server models include email systems and the World Wide Web, where email clients interact with mail servers, and web browsers such as Google Chrome, Mozilla Firefox, or Safari request web content from servers.
A Client refers to a device or application such as a computer, smartphone, or browser that initiates communication and requests services or data from a server. A customized computer or distant system called a server is made to handle, process, and react to requests from clients or other computers connected to a network. The server receives a request from a client, processes it by carrying out the required calculations or data retrieval, and then returns the relevant response or results.For example,request such as viewing a web site, retrieving data, or completing a job. In order for services like websites, databases, email, and file sharing to operate effectively across networks, servers are essential.Before we configure client server network,we have to prepare:
- A computer with a compatible Windows operating system: A version of Windows that supports networking functionality necessary for client-server communication should be installed on the client PC. Because Windows Home editions frequently lack some sophisticated networking features, it is advised to use professional or enterprise editions.
- A server operating system: An operating system built for efficient network resource management must be installed on the server computer. For instance, Windows Server 2012 or later editions offer the services, security, and management tools required to function as a dependable network server.
- Crossover UTP cable: A crossover Unshielded Twisted Pair (UTP) Ethernet cable is used to connect two computers (client and server) directly without the need for a network switch or router. The send and receive wires of this kind of connection are crossed to enable direct communication between the two devices, making network setup and configuration easier.The following are step-by-Step Guide to Setting Up a Domain in Windows Server 2016
- Prepare the Environment: Such as Server Computer, Client Computer, Networking,and Installation process
- Install Active Directory Domain Services (AD DS): Operations like Assign a static IP address to the server and Setting up the DNS server to 127.0.0.1 (loopback address)
To install and configure AD DS:
- Open Server Manager and select Active Directory Domain Services
- Once installed, click Promote this server to a domain controller
- Choose “Add a new forest” and set the root domain name,which is mylab.local
- Provide a DSRM password for Active Directory recovery
-
Click Next through the options:
- NetBIOS domain name will auto-populate
- Confirm locations for AD database, log files, and SYSVOL folder
- Review configuration, proceed to the prerequisite check
-
If the prerequisite check fails:
- Open Command Prompt as Administrator
- Run: net user administrator * and enter a new password
- Then run: net user administrator /passwordreq:yes
- Re-run the prerequisite check
- If successful, click Install. The server will reboot automatically.
To Configure the Client Computer
- Temporarily disable the firewall on the client
- Assign a static IP address like 192.168.100.6 if the server uses .5
- Right-click on This PC,click on Properties ,then click on Change settings
- Click on Network ID → Next through the prompts,press enter Domain username and password and Domain name like mylab.local
- then,Provide computer name and server nameand Complete setup and restart if required
- Finally,Install Additional Windows Server 2016 Services
After setting up AD DS, we also install the following services:
-
DNS Server: used to convert human-readable domain names, such as
letuslearn.edu.et, into IP addresses, such as192.0.2.1, which computers use to identify one another on a network.
To install and configure a DNS (Domain Name System) server on Windows Server 2016:
- Open the DNS Manager by navigating to Tools, then click on DNS from the Server Manager.
- Create both a Forward Lookup Zone and a Reverse Lookup Zone.
-
To create a Forward Lookup Zone:
- Right-click on Forward Lookup Zones and select New Zone
- Click Next in the wizard.
- Select Primary Zone and click Next to continue.
-
To create a Reverse Lookup Zone:
- Right-click on Reverse Lookup Zones, select New Zone, choose Primary Zone, and click Next.
- Select IPv4 Reverse Lookup Zone and click Next.
- Enter the appropriate Network ID and complete the wizard.
- After creating the zone, add a new Pointer (PTR) record to map IP addresses to hostnames.
-
Dynamic Host Configuration Protocol (DHCP) Server: This is another service of Windows Server 2016 that automatically assigns IP addresses and other network configuration parameters (such as subnet mask, default gateway, and DNS server) to connected devices.To install and configure a DHCP Server
- Open Server Manager and click on Manage, then select Add Roles and Features.
- In the wizard, choose Role-based or feature-based installation.
- Select the local server from the server pool.
- From the list of server roles, check DHCP Server.
- Click Next through the features and confirmation screens, then click Install.
- After installation, click Complete DHCP Configuration from the notification flag.
- Authorize the DHCP server using domain admin credentials if prompted.
- Open the DHCP Management Console from the Tools menu.
- Expand your server node and right-click on IPv4, then select New Scope and Follow the following steps,
- Enter a name and description for the scope.
- Set the IP address range (Start IP and End IP).
- Define the subnet mask, default gateway, and DNS server addresses.
- Activate the scope when finished.
-
FTP Server: Used to enable file uploading, downloading, and management via a network, usually the internet or a local area network (LAN).We can configure FTP server
- Open Server Manager and click on Manage,then Add Roles and Features to install the FTP service.
- Create a folder (e.g., with a sample file) in the C:\ drive to use as the root directory for FTP.
- Turn off the Windows Firewall for the Domain, Private, and Public profiles to allow FTP access (or configure firewall rules if needed).
- Install the FTP Server feature from the IIS (Internet Information Services) role.
- Open Internet Information Services (IIS) Manager from the Tools menu in Server Manager.
- Right-click on Sites and choose "Add FTP Site." Enter a name for the FTP site and specify the physical path (the folder you created in C:\).
- Configure the IP address, port (default is 21), authentication method, and user permissions (read/write access as needed).
- Mail Server: A specialized computer or software program that manages email message sending, receiving, and storage across a network. It sends and receives emails using protocols like SMTP, POP3, and IMAP. Mail servers route messages between senders and recipients and maintain mailboxes.To set up a mail server on Windows Server 2016, use hMailServer as the mail server software and Mozilla Thunderbird as the email client on a separate client machine.After installing hMailServer:
- Open the application and connect to the local server.
- Click on "Domains" and add a new domain (e.g., mylab.local).
- Go to the "Accounts" section and create a new email account under the added domain.
- Edit the hosts file located at C:\Windows\System32\drivers\etc\hosts and add the following address mappings:
- 192.168.10.5 mail.mylab.local
- 192.168.10.5 mylab.local
- 192.168.10.5 smtp.mail.mylab.local
- 192.168.10.5 pop3.mail.mylab.local
To configure an email client machine:
- Download and install the Mozilla Thunderbird email application.
- Launch Thunderbird and click on "Email" to add a new account.
- Enter the name, email address, and password that were previously set up in the hMailServer.
- Click "Continue," review the settings, then click "Done" to complete the setup.
- Once configured, you can start sending and receiving emails between accounts.
-
Web Server (Internet Information Services):is a device that uses a local network or the internet to send websites to people via their web browsers. Microsoft created IIS, a web server program. On Windows servers, it is used to host and administer websites. Web pages can be seen by users via HTTP and HTTPS protocols thanks to IIS. On Windows-based platforms, it is frequently used to operate webpages, web apps, and services.After completing the IIS (Web Server) installation:
- Open Server Manager.
- Click on Tools and select Internet Information Services (IIS) Manager.
- The default website files are located at C:\inetpub\wwwroot.
- To add a file to the default document list:
- In IIS Manager, select the Default Document option under your website.
- Right-click on the blank space and choose Add.
- Enter the name of the file that already exists inside C:\inetpub\wwwroot.
- Verify the site bindings (such as IP address and port).
- Open a browser, access the site, and check if your default web page loads correctly.
To create a customized website:
- Start by creating a new zone in the DNS server:
- Open Server Manager,then go to Tools, and select DNS.
- In the DNS Manager, right-click on Zones and choose "New Zone."
- Select "Primary Zone" and make sure to uncheck the option to store the zone in Active Directory.
- Enter the name of the zone, which is usually the domain name.
- Click "Finish" to complete the zone creation.
- Create a new host (A record) within the zone you just created such as "www".
- Assign the IP address of your web server to the host and click the "Add Host" button to save it.
- To verify the DNS configuration, open Command Prompt and run a ping command using the full domain,such as,ping order.company.com.
- On the client computer, open a web browser and enter the fully qualified domain name (FQDN) to access the website.
Latest Posts
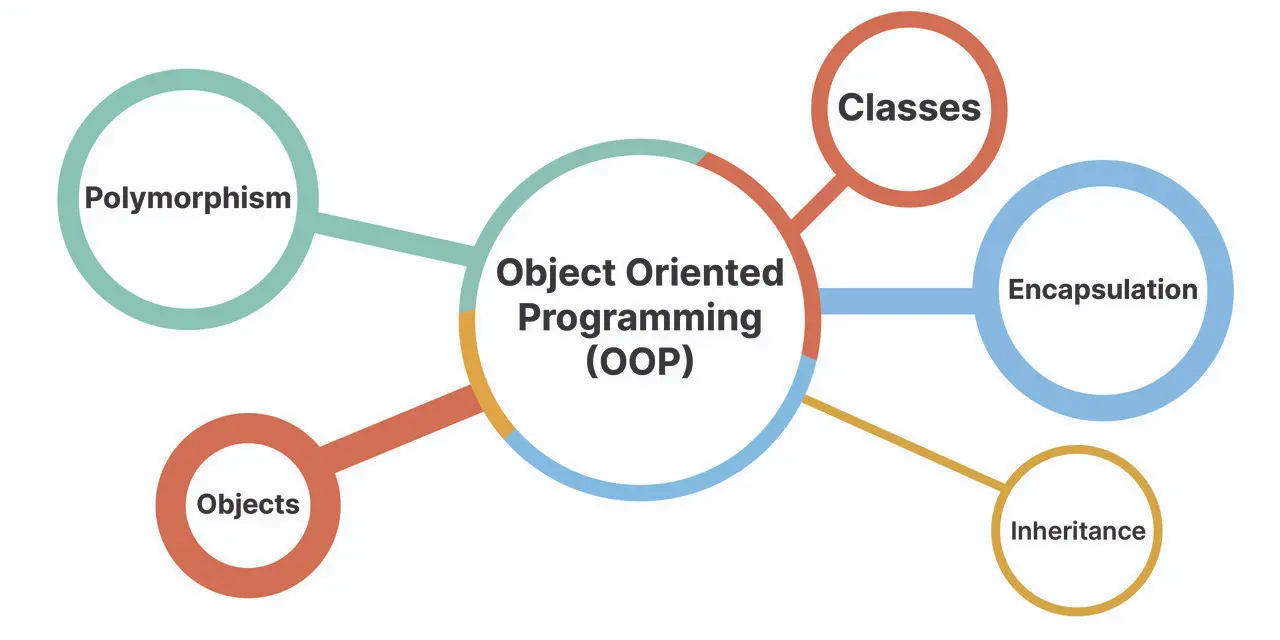
Object Oriented Programming in C++ for Beginners.
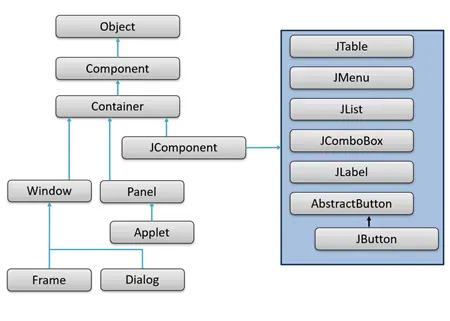
Getting Started with Java GUI
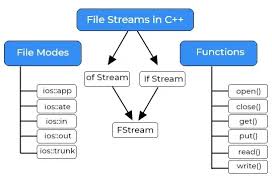
File Handling in C++